
HTML - Beginners Guide Part 3
Well done if you've made it to this point from part 1. You are making progress and have created a basic webpage. In this section, I will talk about links, tables and forms. You will see more detail in each part below.
Please note: If you have not read parts 1 & 2 of this guide - Please check them out now to avoid any confusion throughout this part.
Again as said in the previous parts, I am running Windows 7 - But HTML is the same throughout all the operating systems.
Please note: If you have not read parts 1 & 2 of this guide - Please check them out now to avoid any confusion throughout this part.
Again as said in the previous parts, I am running Windows 7 - But HTML is the same throughout all the operating systems.
The Contents...
- Part 1 - Hyperlinks - Linking to other webpages.
- Part 2 - Tables - How to use tabular data.
- Part 3 - Forms - Textboxes, radio buttons and other user-input elements.
Part 1 - Hyperlinks - Linking to other webpages.
First we are going to talk about webpage linking. Linking one page to another is very easy however a lot of people get confused with how to do it. So let me explain, first we are going to link to another page on the internet. In this case, I will link to Google - So lets start with the code.
<html>
<head>
<title>My First Link</title>
</head>
<body>
<a href="http://www.google.com/">Click me to visit Google</a>
</body>
</html>
Of course we have the usual structure, however we have added a new attribute which we haven't seen before (<a href>) - The destination of the link is defined in the href attribute. As you can see I have used Google, and you have to ensure you have written the full URL address (including the http:// part).
Then in between the <a href> and <a> tags you insert the text which will contain the hyperlink. In this case I have used 'Click me to visit Google' in which when a user clicks on any of that text they will be redirected to Google. Lets take a preview on a web browser.
Webpage Preview;
So that's it! We have linked to another webpage on the internet. You can see that the text is blue and underlined indicating it is a link. However, what if you want to redirect to one of your offline files... Such as redirecting your home page to your contact page. Well I'll show you how. Lets start by ensuring you have kept the folder. I want you to delete your files except your 'Images' folder (You can create a new folder and keep the existing one if you wish). Then create 4 pages named 'index.html', 'about.html', 'store.html' and 'contact.html'.
Then copy and paste or write out the following text in each one;
<html>
<head>
<title>Linking My Webpages</title>
</head>
<body>
<a href="index.html">Home</a>
<br>
<a href="about.html">About Us</a>
<br>
<a href="store.html">Store</a>
<br>
<a href="contact.html">Contact Us</a>
</body>
</html>
You can see we've used the same method as before - However we have just inputted our file names instead of a website. This is ensuring that the files are all in the same directory, if your webpage was saved in a different folder, you will have to define the location of that folder.
You can also see I have used the <br> element, this just stands for 'Break Row' and starts a new line on the webpage. So let's take a look at the preview. Try it yourself and you can see the browser actually redirects to each file. Add some information on each page to see the change easier.
Webpage Preview;
Congratulations - You have linked to other files on your website! Of course you can use this to link images, so if you were to have a navigation bar created in Photoshop, you could put it on your website! Eventually I will go through this more once I've got the main basics out of the way. So let's move on with tables...
Part 2 - Tables - How to use tabular data.
Next we are going to talk about tables. Tables are a big part of HTML and can be very useful when building webpages. For the purpose of this tutorial, I will use a 3x4 table with 12 cells. Lets start with the code - Copy this in the <body> part of your document.
<table>
<tr>
<td> Row 1, Cell 1 </td>
<td> Row 1, Cell 2 </td>
<td> Row 1, Cell 3 </td>
</tr>
<tr>
<td> Row 2, Cell 1 </td>
<td> Row 2, Cell 2 </td>
<td> Row 2, Cell 3 </td>
</tr>
<tr>
<td> Row 3, Cell 1 </td>
<td> Row 3, Cell 2 </td>
<td> Row 3, Cell 3 </td>
</tr>
<tr>
<td> Row 4, Cell 1 </td>
<td> Row 4, Cell 2 </td>
<td> Row 4, Cell 3 </td>
</tr>
</table>
This looks complex but in reality its really simple. Lets go through the code...
The <table> element of course defines the table.
The <tr> element defines a table row, and should be used for each and every row you are going to input.
The <td> element defines each cell, and must be enclosed in the <tr> tag, as shown in the code.
So that's how you make a very basic table - You can use this tag to insert data you want presented on your website, or even use it as the basic structure of your webpages. Let's have a look at the code in a browser.
Webpage Preview;
Part 3 - Forms - Textboxes, radio buttons and other user-input elements.
This part is a little more advanced and includes inputting user-input elements on your webpage. Elements such as radio buttons, tick boxes and text boxes. On their own, they are actually quite useless in HTML because they require other languages combined with them to process the information gathered by a user. However I will show you the basic form types and what they are there to do with examples.
First lets state that these user-input elements are written within the <form> tag. This tag obviously defines that is is a form, but within this tag an action attribute is used to let the document know where the form's information is being sent too. We will go through this more in later tutorials, but for now I will use an example, as shown below;
First lets state that these user-input elements are written within the <form> tag. This tag obviously defines that is is a form, but within this tag an action attribute is used to let the document know where the form's information is being sent too. We will go through this more in later tutorials, but for now I will use an example, as shown below;
<form action="examplescript.php">
</form>
What can also be included in the <form> tag is the method, which defines how the information is going to be sent. It can have the value 'get' which is default, and attaches the form's information on the web address. Or we can use 'post', which essentially sends the information 'invisibly'.
'Post' is used for more-lengthier forms such as contact forms - So in this case I will use that. See the example code below.
<form action="examplescript.php" method="post">
</form>
Now we are going to talk about the <input> tag, which is the mother of the form world. It can take a variety of elements, and I have listed some of the common ones below;
- <input type="text"> or simply <input> is a standard text box. This is basic and can be used for simple information such as First Name.
- <input type="password"> - This is similar to the text element, however hides the characters entered.
- <input type="checkbox"> - A checkbox is used in many forms and is a simple tick box which can be toggled on or off by the user.
- <input type="radio"> - Similar to the checkbox, however only one can be selected.
- <input type="submit"> - This attribute defines a submit button and is used to submit the information entered in the form. It can contain a value attribute which defines the text on the button. See below for an example.
<h2> Please enter your information below; </h2>
<form action="examplescript.php" method="post">
<p>First Name:</p>
<input type="text" value="First Name">
<p> Email Address:</p>
<input type="text" value="Email Address">
<p>Male or Female?</p>
<p><input type="radio" name="areyou" value="male"> Male</p>
<p><input type="radio" name="areyou" value="female">Female</p>
<input type="submit" value="Submit My Info">
</form>
So you can see here I've written this simple form which requires some basic information. Remember that this goes between your <body> tags.
Let's take a look at what this looks like in the browser.
Webpage Preview;
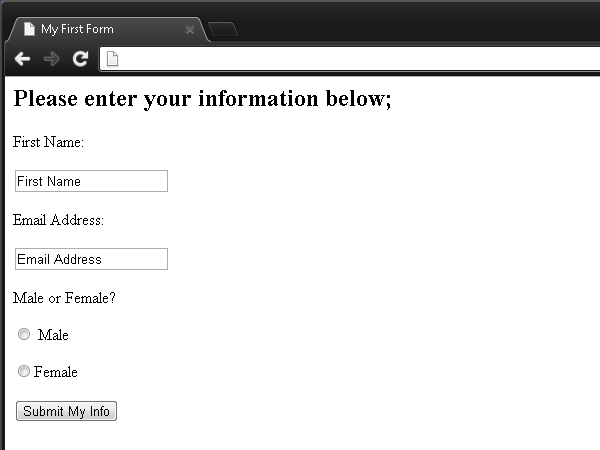
Of course this information doesn't actually get sent anywhere because there is no real PHP script, but I will go through this more in detail in future.
Thanks for joining me for part 3 - I hope you've learned something new about HTML and what it has to offer. Again, more tutorials just like these are in development and coming soon, so keep dropping by to keep updated! Be sure to share Berrytech with your friends - See you soon folks!

Berrytech
