
How To Create Shutdown / Sleep / Lock & Restart Icons in Windows 7 & Vista
If you want to further enhance the functionality of your computer system, adding a Shutdown, Restart and Lock icon to the desktop can be a great aid. These efficient shortcuts will allow you to perform vital actions such as restarting or locking your computer from the click of an icon, rather than always having to select the Start Menu and browse the different options.
This how-to was suggested by 'The Little Code Corner' - click the button or the link at the bottom of the page to go to the website. If you would like to request or suggest other tutorials and how-to's, please visit the homepage and send me a comment through the Contact Form. Until then, please enjoy the article.
Please note: I am using Windows 7 to demonstrate how to create these icons. This is confirmed to work in both Windows 7, 8 and Vista - so other operating systems may and will most likely differ.
Quick Steps:
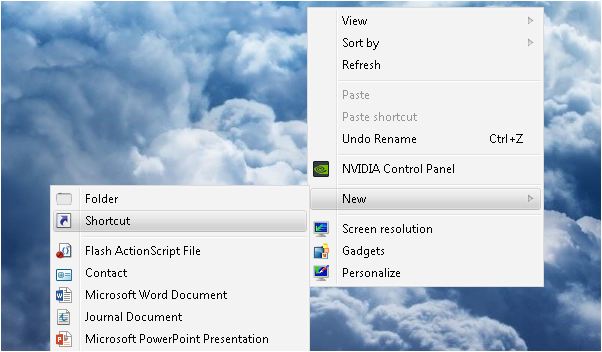
Step 1: Right-click desktop and select 'New Shortcut'
Step 2: Enter a command out of the list found below. Click 'Next'
Step 3: Rename the shortcut to a desired phrase, and click 'Finish' - then change the icon to suit your needs.
Step 2: Enter a command out of the list found below. Click 'Next'
Step 3: Rename the shortcut to a desired phrase, and click 'Finish' - then change the icon to suit your needs.

More In Depth...
Step 1: The first step is to right-click on your desktop, and select New Shortcut. This can be found by hovering the cursor over 'New' and selecting 'Shortcut' - as you can see in the screenshot below.
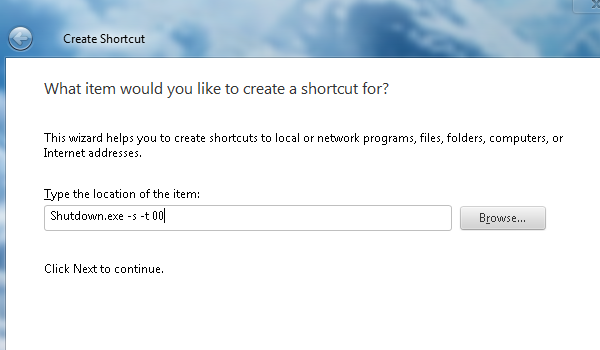
Once you've selected New Shortcut - a wizard dialogue will appear with some options. This includes specifying a directory for the shortcut, which is where we type in the 'magic' codes. Of course there is some logic behind what you're entering into this text box, such as running certain .exe files, but that's for another day.
Step 2: As for the next step, you will again need to enter a command which will tell the operating system what to do. I have listed a variation of commands that can be created below, so copying and pasting is all that's necessary in order to create the different icons. Below the list - you'll find a screenshot of the command written in the wizard's text box.
Shutdown The Computer
Shutdown.exe -s -t 00
Restart The Computer
Shutdown.exe -r -t 00
Log Off User
Shutdown.exe -l -t 00
Lock The Computer
rundll32.exe user32.dll,LockWorkStation
Sleep The Computer
rundll32.exe powrprof.dll,SetSuspendState 0,1,0
Hibernate The Computer
rundll32.exe PowrProf.dll,SetSuspendState
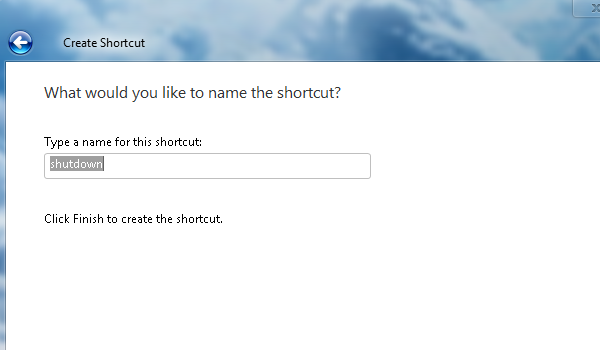
Step 3: Once you have entered the desired command, simply click the next button. The wizard will then ask you to enter a name for the shortcut. By default, it will usually say 'shutdown' - in which you can change it to any name you please. This won't at all affect the functionality of the shortcut, and it can always be renamed in future.
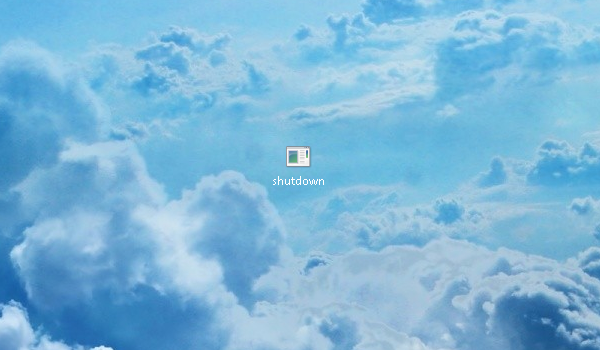
Step 4: That's it! You now have a Shutdown shortcut on your desktop. However, the application will have a dodgy and dull looking icon which is the default application icon in Windows Vista and 7. In order to change it - you can follow these further steps to suit your needs.
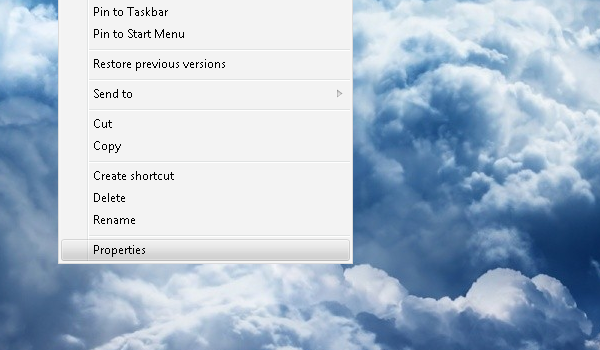
Changing the icon is extremely simple, and involves right-clicking on your new icon and selecting 'Properties' - which you can see in the screenshot below.
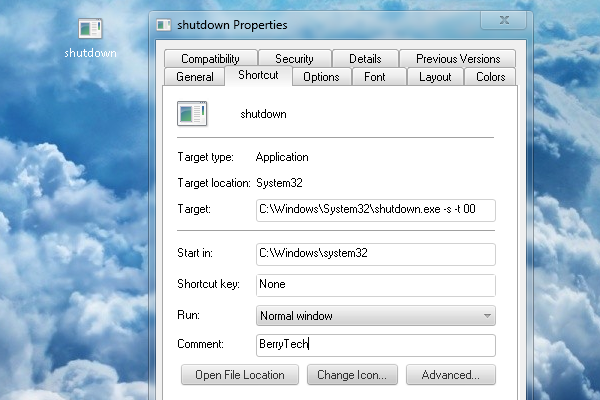
Step 5: This will trigger a dialogue to pop up. By default - you should already be on the 'Shortcut' tab, but if not simply navigate to it by clicking on Shortcut. On this tab, you'll find a button called 'Change Icon' - as the name implies, this will enable you to create an icon of your choice. Simply click the button, and another dialogue will open. See below for screenshots and further steps.
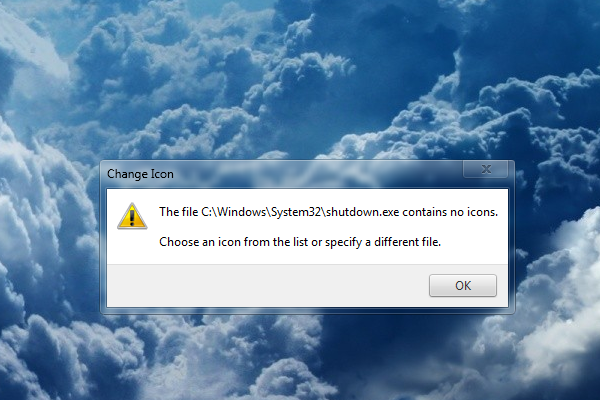
Please Note: when selecting the 'Change Icon' button - an error message may appear announcing that there's no icons stored in the directory C:\Windows\System32\shutdown.exe - however this isn't a problem. Simply click 'OK' and it will automatically browse the default icon directory in Windows. If not - navigate to C:\Windows\System32 and select shell32.dll
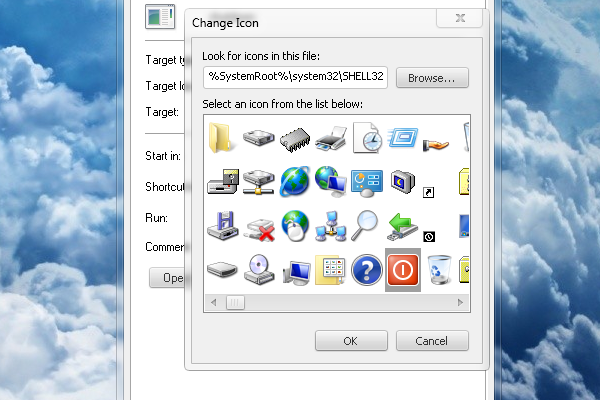
Step 6: The screenshot below shows the icon browser. Here, you can select an icon that is included within Windows 7 and Vista's operating system. You can browse all of the icons if you wish, but the shutdown icon is presented on the first set of icons you can see. To save the icon, you can simply click 'OK' and 'Apply' on both dialogues.
After changing the icon and renaming the shortcut - the icon looks fairly clean on the desktop, and is a great addition to your collection of shortcuts. You can see a picture of these icons below.
Note: The 'Restart' icon was downloaded from a third-party site - known as http://findicons.com. See the list of websites below to download additional icons and further expand the level of customisation.

Download Free Icons:
Suggestion Made by The Little Code Corner
So that's it everyone. You can now have fully-functional and efficient icons that you can customise to your liking. In Windows 7 - you can also pin the icons to the Taskbar which can be an effective way to save time.
If you like the tutorial, please take time to look at some other how-to's and articles - and share the site with your friends. Every bit of support is really appreciated.
If you like the tutorial, please take time to look at some other how-to's and articles - and share the site with your friends. Every bit of support is really appreciated.